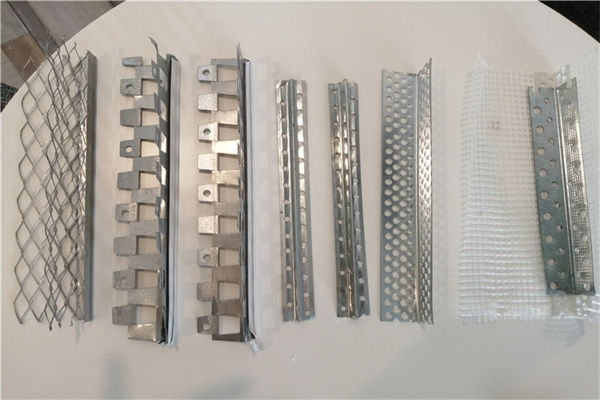
One way to trim windows is to install drywall around them, and when you do this, you have to finish the corners with corner beading, a protective finishing trim. You can use metal or plastic beading, and attach it with screws, nails or adhesive. If you decide on either of the first two options, you need metal beading, and you need plastic beading for the last option. Whichever method you use, properly cutting and securing the ends of the beading is the key to easy finishing. If the ends buckle, it’s almost impossible to get a flat finish.
1.Install the drywall on the wall and window inset so that there is a 1/2-inch gap between the edges of the sheets. Don’t overlap one of the sheets on top of the other.
2.Measure the distance between the top and bottom of the frame on one of the side corners with a tape measure and measure this distance on a piece of metal or plastic corner beading.
3.Mark the distance you measured on the bend of a length of corner beading and make marks with a pencil. Draw lines that spread out perpendicular from those marks with a combination square. Alternatively, draw 45-degree angles splaying out from the marks. Cut along the lines with tin snips.
4.Spray adhesive on the walls on both sides of the corner if you’re installing plastic beading. Set the beading in position and push it into the adhesive. If you’re installing metal beading, drive 1 1/4-inch drywall screws with a screw gun to secure it. The screws should be spaced by about 12 inches and make a slight dent in the beading. Alternatively, drive 1 1/4-inch drywall nails with a hammer, spacing them the same distance apart.
5.Install beading on the other three edges of the window in the same way. Drive a fastener into the the two sides at each end of the beading to keep the ends from curling upward. If you’re using adhesive, spray a little extra at the ends.
6.Spread a generous coat of joint compound along both walls that form each corner and scrape it flush with the edge of the beading with a 4-inch drywall knife. Let the compound dry overnight.
7.Topcoat with at least two more coats of joint compound. Let each coat dry before applying the next, and use a progressively wider knife for each coat to aid flattening and feathering.
8.Sand the final coat with 120-grit sandpaper when it dries. Apply texture to the wall, if desired, and let it dry. Prime the joint compound with drywall primer, then paint the wall.
Post time: Mar-03-2023